Leather jackets and gear is the classic look for an motorcyclist. They are also a good choice when it comes to protection. But did you know that leather has to be cleaned and conditioned on a regular basis? This is especially import for us motorcyclists to know since, our leather gear gets exposed to all the elements, sun, rain, dirt, road grim, etc.
Think about it, if your seat is made out of leather, it will sit out in the sun the whole time you have it out. The UV rays and heat from the sun can quickly dry out the leather and cause it to start cracking. Conditioning the leather helps prevent this from happening and will increase the life of the leather.
Below I will list the basic steps it takes to clean and condition leather. This process is not just for motorcycle gear, you can use these same steps to clean any item made from leather (except suede) These could include purses, shoes, jackets, pants, gloves, backpacks, sofas, chairs, etc.
Why do you Need to Clean and Condition Leather?
Leather at the end of the day is skin. If you think about it, your skin can dry out and will need lotion for it to look good and be comfortable. The natural oil from your skin is what keeps it hydrated and soft.
Since leather does not have a natural process of keeping itself hydrated, it is our job to clean and condition our leather products to keep them looking nice and prolong there usable lives.
Leather that has been taken care of and cleaned regularly, should last a lifetime. And since genuine leather products are a bit pricey, It also make financial sense to keep them as nice as possible.
Cleaning and conditioning leather is a pretty simple task and you should do this procedure at least once a year. Even if you do not use it that often, it should be taken care of.
How to Clean the The Leather

- To clean the leather you need to mix up a solution of dish soap and warm water.
- Use a soft cloth and dip it into the cleaning mixture.
- Wring out the cloth and wipe down all the surfaces.
- Use a second clean cloth to wipe off any extra soap and water mixture off the leather.
- Use a third cloth or towel, wipe the leather down to make it as dry as possible.
- Hang up the leather to allow it to air dry. Do not leave it on the floor or crumpled up, this could cause mold or mildew to form on the jacket. This could potentially ruin the leather.
What if there are Stains?
For most stains you can use a small amount of rubbing alcohol on a cotton swab to gently clean the stain. Do not rub it all around because you may risk removing the coloring or stain on the leather. Once the stain is removed, wipe the area down with a clean cloth.
For oil stains, you can put a small amount of baking soda over the oil spot and work it in with a damp cloth. The longer you leave the baking soda on there the better. When you feel the stain has been removed, use a clean cloth to wipe the area clean.
Ridingwithoutreason.com is a participant in the Amazon Services LLC Associates Program, an affiliate advertising program designed to provide a means for sites to earn advertising fees by advertising and linking to amazon.com.
How to Apply the Conditioner
Once the leather is cleaned and dry we need to condition it. This step is just as important as cleaning the leather, so it should not be skipped. Conditioning the leather is what actually hydrates the leather and in a lot of cases, make the leather look new again.

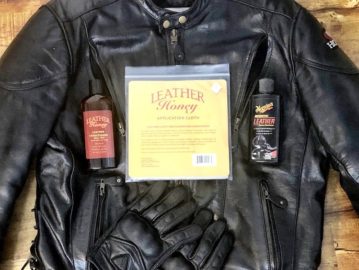
I use Leather Honey to condition my jackets and gear. It is easy to apply and it is non-toxic. Plus you do not need a lot of it, so a small bottle will last you awhile. If you are conditioning a piece of furniture, I would get the bigger bottle that they sell on Amazon. To apply the Leather Honey, follow the steps below:
- Put the bottle of Leather Honey in the microwave for a few seconds. This will allow it to flow a bit easier.
- Put a small amount onto a microfiber cloth and rub it into the leather. I would start in a hidden area to make sure it looks correct.
- Rub a thin coat of condition across the entire surface and let it sit for a minimum of two (2) hours. (Best results if you let it sit over night)
- Wipe off any access conditioner with a clean cloth.

Conclusion
Leather gear and be very expensive and it is best to take care of it. Doing these simple steps allows you to keep your leather gear as long as possible, plus it makes it look nice. Keeping the gear maintained not only makes it look nice, but can help keep the leather strong and in good condition. The leather is there to protect us in the event we ever go down on an motorcycle.
If you are curious what type of gear I use and maintain, you can check it out on my Bikes & Gear page.