There are times when you will have to remove your motorcycle’s seat to gain access to the battery or perform maintenance. This is a very common thing you have to do when it comes to fixing almost anything on this motorcycle. I have written an article that has an list of upgrades you can do to this motorcycle. Most of these updates require you to remove the seat, so it is a good thing to know and be comfortable doing. Below I will explain how to remove and re-install the seat.
Removing the Seat
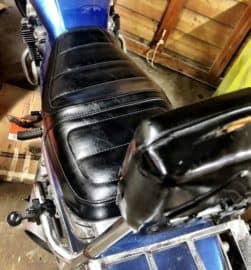
Step 1: You will have to remove the two side covers on each side of the motorcycle. These are located directly beneath the seat. This usually has the Nighthawk logo on it. (left side of the picture below) The side panels are held in place by three plastic push pins. Pull the panel straight out to avoid bending or breaking the pins.
Step 2: After you have removed the side covers you will have access to two bolts that secure the seat to the motorcycle’s frame. They are located around the middle of the seat and are circled in red. (on the right side of the picture below)

Step 3: You may have to wiggle the seat a little to get it loose before it can be completely removed from the frame. There is a tab on the front of the seat to help hold the seat down. The easiest way to remove it is by pulling the seat towards the back wheel and up. After the seat has been removed you will have access to more components of the motorcycle, like the battery. blinker relay, and air filter.
This is usually the first thing you need to do to gain access to other parts of the motorcycle. I have a article that shows you How to Replace the Petcock (fuel valve) on the gas tank. Another example is how you can Install LED Blinkers. These are just a few examples of why you would need to remove the seat.
Installing the Seat
Step 1: When re-installing to seat you need to make sure that the tab (located on the bottom front of the seat) fits into the bracket before you try to push the seat down into place. If you do it correctly, the front of the seat will be flush with the tank and the bolt holes will line up correctly.
Step 2: Screw in the two bolts that hold the seat to the frame. These do not need to be torqued down very tightly. The last thing you want to do is round off the bolt heads or ruin the threading.
Step 3: Line up the pins of the side covers and press them firmly into they rubber fittings. Make sure these are pulling pushed in, so they do not fall off while riding. You have now successfully removed and re-installed the seat!
If you are interested in what Motorcycle and gear I own, you can check it all out on the Bike and Gear page!