I first noticed something was wrong with my 1984 Honda Nighthawk 650 (CB650SC) when there was a strong smell of fuel when the motorcycle was running. When I went down to investigate what the issue was, I noticed there was squirting fuel out of a small breather tube on the petcock itself.

Now this leak was only happening when the motorcycle was running. In the past, I was having a fuel delivery problem that I go into more detail on my article Motorcycle Stalling while Riding. From that experience, I know starting in the 1980’s, most petcocks are vacuum actuated. If you do not know what that means I can quickly sum it up for you.
Even though you petcock has an “ON”, “OFF”, and “RES” setting, gas will not just flow through the valve. That is because there is a second valve that is always closed unless there is a vacuum being pulled from the engine. On my Nighthawk, the vacuum comes from the number two cylinder. So the petcock has two sides to it. One side is where the fuel flows through it and the second half is when air is pulled through it.
These two sides should never spill into one another. So, back to the issue, if fuel is squirting out of the air side of the petcock, the seal that keeps them separated has started to fail. There is a small diaphragm that is between the two sides. If that is torn, that is the issue.
Ridingwithoutreason.com is a participant in the Amazon Services LLC Associates Program, an affiliate advertising program designed to provide a means for sites to earn advertising fees by advertising and linking to amazon.com.
The Fix
There are pretty much just two ways to fix this issue. You can either rebuild the petcock, or just replace it with a brand new one. Both fixes will require you to remove the tank from the motorcycle, drain the fuel, rebuild/replace the petcock, and put everything back together.
For my 1984 Honda Nighthawk 650 (CB650SC), I could get either a rebuild kit or a whole new petcock. Since the price of a whole new unit was not that much more expensive, I elected to just replace the whole thing.

Replacing the petcock is really simple and you can do it with a few basic hand tools. I was able to replace the valve in less than an hour. Below is a semi-detailed breakdown on how I did it. I have also included pictures to hopefully make it easier to follow.
Step 1 – It’s best to get as much fuel out of the tank as possible. The emptier it is, the easier it will be to move around. Remove both side covers to gain access to the bolts that hold the seat down and remove them. (circled in red)

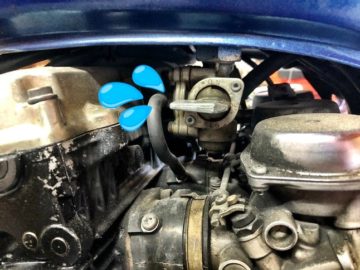
Step 2 – Disconnect the vacuum line that is connected to the petcock. If the line is old or damaged replace it. A bad line will not allow the valve to open when the engine is running.

Step 3 – Disconnect the two wire connection that is for the fuel gauge. (circled in red) And pull the wire out of the metal holder if it is connected.

Step 4 – Remove the bolt that holds the bottom of the fuel tank to the frame. To remove the tank, pull it towards the back wheel to unlock the front of the tank.

Step 5 – Disconnect the fuel line that connects to the carbs. (circled in red) The tank has now been fully disconnected from the rest of the motorcycle.

Step 6 – Place the tank on top of two five gallon buckets and connect a hand vacuum pump to the port that had the vacuum line on it.(Green square) By pulling a small vacuum on that, it will let the remaining fuel drain out of the tank. (Make sure the switch is set to “RES” to get the most fuel out)

Step 7 – Unscrew the nut that is holding the petcock to the gas tank. Once you pull it out, make sure that the old filter is pulled out. There is a chance it will not come out when you pull out the old valve.

Step 8 – Screw in the new petcock and make sure it is facing the right direction. do not screw it to tight, you risk ruining the threads on the tank itself.

Step 9 – Fill the tank with enough fuel and check for leaks. If everything looks good, put the motorcycle back together and start the motorcycle. When it has been running for a few minutes, check for any more leaks.
Conclusion
Hopefully this has helped if you are having a similar issue with your motorcycle. Vacuum controlled petcocks can be the cause of a lot of fuel delivery problems when they start to get old. What my professor said back in college sums up repair perfectly. “Anything that moves, will always break” #OldBikeLife
P.S. You may want to consider replacing your fuel lines or filter while you have the tank removed and out of the way. It is also a good time to replace the spark plugs if that has to be done as well.
If you are curious what type of gear I use and maintain, you can check it out on my Bikes & Gear page.