The Problem
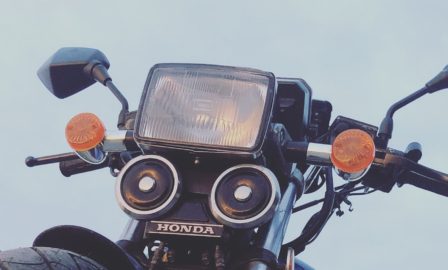
After I crashed my 1984 Honda Nighthawk 650 (CB650SC), I ended up breaking the glass lens on the sealed headlight. During my three month recovery, I spent almost everyday looking online to find a replacement headlight, so I could get the bike back onto the road. At the end of the day, I was unable to find one for sale.
After finding out that a replacement was out of the question, I decided to fix my broken headlight. Unfortunately I did not take any photos of this process, because I had no idea if it would work. What I ended up doing was buying a headlight from a similar model of motorcycle and removed its lens from the base to use on my motorcycles base.
Below I will list everything I did and used to repair the glass lens on my sealed motorcycle headlight.
Ridingwithoutreason.com is a participant in the Amazon Services LLC Associates Program, an affiliate advertising program designed to provide a means for sites to earn advertising fees by advertising and linking to amazon.com.
What You need
- Headlight base to your motorcycle
- Glass Lens from donor headlight
- Weather or Headlight Sealer
- Flat Head Screw driver or other Pry Tool
- An Oven
- Misc. Cleaners
The Steps
- Clean the housing the best you can to remove any dirt and grime, so it does not get baked.
- Preheat the Oven to 200°F ( 93°C)
- Place the headlight on a oven safe pan and bake the headlight for 15-20 minutes. This will loosen up the sealant and make the lens removal easier.
- Using a flat head screw driver (or other pry tool) GENTLY pry the glass lens away from the base. Putting to much force in one spot could cause the glass to crack.
Work the pry tool all the way around the lens until it pulls apart from the base. Put it back in the oven for a few minutes if it is not loose enough. - Clean out all the old sealant from the base and lens.
- Apply fresh sealant all around the base and clamp the glass lens to the base. Make sure the sealant is all the way around the lens and it is completely sealed.
Failure to do so will allow water to get into the headlight and shorten the life of your headlight bulbs. - Follow the directions from your sealant to find the time it takes for it to cure. I let mine sit overnight just to make sure it was completely dry.
- Remove any clamps and verify that the lens is fully secured to the base.
- Mount repaired headlight back onto the Motorcycle!
Final Thoughts
I did this repair about two years ago (from the time of this writing) and I can report that the repair is holding up well. To get the new glass lens, I bought a headlight from a 1980’s Nighthawk 700. The glass lens on the front matched my broken lens, but the base would not fit on my 650 series motorcycle. Using the steps listed above I was able to remove the broken glass from my base, remove the glass from the donor headlight, and seal the new glass into my old base.
This process should also work on automotive headlights, but I have not tested it myself.
If you are interested in what Motorcycle and gear I own, you can check it all out on the Bike and Gear page!
I hope this information is helpful if you are having the same issue that I had.

